
Going to Toilet
Toilet Training
Narrator: Toilet training
Scene: Mum and Katie are playing in the living room. Mum shows her how to use the potty.
Narrator: Bowel and bladder control in young children is a gradual learning process. If you find your child has the following signs, such as remaining dry for about two hours in the daytime, following simple instructions, showing you the need to go to the toilet with gestures or words, having interests in going to the toilet, having fairly predictable bowel movements, or feeling uncomfortable when the diaper is soiled or wet, it is time to help your child say goodbye to diapers.
Heading: Getting Ready for Toilet Training
Narrator: Getting ready for toilet training.
Scene: Mum puts the potty in the living room.
Sub-Heading: Get a suitable potty
Narrator: First, get a suitable potty and leave it in a fixed location where your child can easily get to it.
Scene: The potty has a urine guard at the front of the potty seat.
Narrator: A potty seat with a urine guard at the front is preferable for boys to prevent splashing.
Scene: Mum puts a child-size seat on an adult toilet together with a stepstool.
Narrator: If you train your child using an adult toilet, put a child toilet seat on it together with a stepstool under your child's feet for support.
Heading: How to Start Toilet Training
Narrator: How to start toilet training
Scene: Mum and Katie are wearing summer clothes. Katie is playing on the floor.
Narrator: Start training in warmer seasons. Your child can wear fewer layers which makes it easier for putting on and taking off. Pick the period that you have some free time everyday to train your child.
Scene: Katie sits on the potty while she is playing toys.
Narrator: Let your child get to know the potty. Play with her by letting her sit on it to pretend and go through the steps of going to the toilet.
Narrator: When you and your child are ready, it's time to start the training!
Scene: Mum and Katie are in the bathroom
Sub-Heading: Arranging toilet time
Narrator: To begin, you may ask her to go to the toilet according to her bowel pattern. Then, fit the toilet time into her daily routines gradually, for example, after waking up, after meals or before bedtime.
Scene: After breakfast, Mum takes Katie down from the high-chair.
Narrator: Mum and Katie have finished their breakfast. Mum starts the toilet-training routine with Katie.
Scene: Mum takes Katie to sit on the potty and Mum sits next to her.
Narrator: Mum takes Katie to sit on the potty and stays with her.
Scene: Mum and Katie are reading a book on the sofa. She notices that Katie may need to wee or poo. She clarifies with Katie and encourages her to sit on the potty.
Narrator: It would be easier to train pooping first. When your child shows signs to poo, ask if she has the urge and encourage her to sit on the potty.
Scene: Mum is teaching Katie the correct sitting posture.
Sub-Heading: Proper sitting posture
Narrator: Proper sitting posture eases passing out of a stool.
Scene: Katie's hips are below the knees while the elbows are on the knees. She sits straight and pushes by puffing up the tummy.
Narrator: Keep her hips below the knees while putting the elbows on the knees, sit straight and push by puffing up the tummy.
Heading: Steps of Going to the Toilet
Narrator: Steps of going to the toilet
Scene: Steps of going to the toilet.
Narrator: Explain the steps involved in toileting to your child.
Scene: Katie wants to go to the toilet.
Narrator: First of all, when your child tells you she needs to go to the toilet
Scene: In the bathroom, the child toilet seat and stepstool are ready.
Narrator: Take her to the toilet or potty.
Scene: Mum assists Katie to pull down her pants.
Narrator: Help her to pull down her pants
Scene: Katie sits on the toilet seat.
Narrator: Sit on the toilet seat or potty
Scene: Mum is teaching Katie to wipe clean.
Narrator: Then wipe clean.
Scene: Mum assists Katie to put on the pants, flush the toilet and teach her how to wash hands.
Narrator: Pull up the pants, flush the toilet and wash hands.
Scene: A boy is sitting on the potty.
Narrator: For teaching boys to wee, it may be easier if they are in a sitting position. You may also teach him to press down his penis to avoid splashing.
Scene: Katie sits on the potty with her diaper on while she is playing with a toy.
Narrator: Some children may resist taking off their diapers. You can let them sit on the potty with a diaper on first.
Scene: Katie poops in her diaper. Mum unfastens her diaper and drops it into the potty.
Narrator: You can drop the soiled diaper into the potty and let you child see it.
Scene: Mum takes off Katie's diaper and places the diaper into the potty. Katie then sits on the potty.
Narrator: When your child gets used to it, you can unfasten her diaper and put it into the potty before she sits on it. Toddlers usually wee when they poo and so you can train them both at the same time.
Scene: Mum helps Katie to put on the training pants and then pants.
Narrator: Consider using cotton training pants during daytime. When your child feels uncomfortable with wet or soiled pants, she would accept the potty more readily.
Heading: No Pressure, More Encouragement
Narrator: No pressure, more encouragement
Scene: Mum and Katie are playing a toy piano. Mum takes her down the sofa and asks her to take a wee. Katie protests.
Narrator: If your child resists sitting on the potty, don't force her. Ask again later.
Scene: Katie is playing the piano while sitting on the potty. Mum stays next to her.
Narrator: At the beginning, stay with your child and make her more relaxed by talking to her, reading a story or playing with her while she is on the potty.
Scene: Katie uses the potty successfully, Mum praises her.
Narrator: When your child uses the potty successfully, praise her.
Scene: Katie has been sitting on the potty for a few minutes but she does not wee or poo. Mum pats her head and compliments her patience.
Narrator: If she is not successful, even though she has been sitting on the potty for a few minutes, you still have to praise her for her patience and let her leave.
Scene: Katie wet her pants and sits at the corner. Mum is cleaning the floor.
Narrator: If your child accidentally soils or wets her pants, just clean up for her calmly and remind her of the toileting steps.
Scene: Mum is teaching Katie to go to the toilet.
Narrator: Remember! Toilet training aims to help children achieve self-control. Don't force them or shout at them. Be patient and practise with your child every day.
Scene: Water and vegetables
Narrator: Make sure your child has plenty of fibre and fluid intake. This helps bowel movement and urination especially in the process of toilet training.
End Shot: Department of Health logo
The Department of Health owns the copyright of this digital video.
This digital video is produced solely for non-commercial use.
It should not be rented, sold or otherwise used for profit-making purposes.
Produced in 2015
There are various reasons for parents to start toilet training early for their children, such as preparing the child for entering nursery school, saving money and troubles on nappies, and being eager for the child to grow up to be a big kid. However, toilet training is a natural learning process and it takes time. The essential conditions are the physical and psychological readiness of the child. Generally speaking, children begin to show signs of readiness around 18 to 24 months old.
Explain to your child the steps in going to the toilet:

1. Tell you her toilet need


2. Go to the toilet/potty and pull down her pants


3. Sit on toilet seat/potty

4. Wipe clean after weeing/pooing

5. Pull up pants

6. Flush the toilet

7. Wash hands
Tips:
- Some children may resist using toilet or potty to poo. Let your child sit on the potty with nappy on. After she has pooed, take off the nappy and put it into the potty. Gradually, you can try putting the nappy into the potty before she sits on it.
- Children usually urinate when they empty the bowel. You may make use of the bowel training time to train both together.
- During the initial period of training, it may be easier for boys to sit down to urinate. You may teach him to press his penis down gently to keep urine flowing into the potty.
- Encourage your child in a relaxed manner. Don't rush the training and cause tensions. You may stay by her side to talk to her, tell her stories or play with her, and provide assistance when she needs you.
- If your child succeeds, even though she has been sitting on the potty for a few minutes, you still have to praise her for her patience and let her leave.
- To help your child to accept the potty, you may choose toilet training pants which absorb ‘accidents' and help the child realize they are wet, thus breaking the association between having passed urine or stool in nappies and remaining comfortable.
If hiccups occur
- Children under two and a half years old cannot completely achieve bowel and bladder control in day time. Be understanding and patient to him, and accept his failures.
- Children vary in the time they can achieve bowel and bladder control. Do adjust your training according to the conditions of your child.
- Successful toilet training needs time and patience.
- If your child accidentally soils or wets his pants, clean up for him calmly and remind him of the toileting steps.
- Be calm and relax in toilet training. Pressuring your child may make things worse.
- Remember that toilet training is to help your child exert control over his own body, rather than you exercise control over your child.
Home safety
Home safety
Title: Home Safety
Narrator: Home safety.
Photo: A girl (12 – 18 months old) is bringing some toys to her dad.
Photo: A boy (12 – 18 months old) is running in the living room while his parents are looking at him.
Photo: A boy (18 – 24 months old) is climbing up the sofa
Photo: A girl (18 – 24 months old) is pulling the curtain ropes
Narrator: Your energetic child loves to run and jump around! However, he has no idea of any danger around him. You should stay alert and check home safety measures regularly so as to prevent any possible accidents.
Heading: Ensuring Your Child's Safety
Narrator: Ensuring your child's safety.
Sub-heading: Don't leave your child alone at home
Photo: Daddy is going out, his son (5 years old) and daughter (3 years old) are saying goodbye to him. Big cross.
Photo: Daddy is going out, Mum, his son (5 years old) and daughter (3 years old) are saying goodbye to him.
Narrator: To ensure safety, don't leave your children alone at home or to the care of older children. Remember, there should be an adult with them at all times.
Sub-heading: First-aid kit
Photo: First-aid Kit
Narrator: Keep a first-aid kit at home in case any minor accidents occur. It should include:
Sub-heading: Alcohol swabs
Photo: Alcohol swabs
Narrator: Alcohol swabs: for sterilising both hands before performing first-aid treatment.
Sub-heading: Gauze roller bandage
Photo: Gauze roller bandage
Sub-heading: Elastic roller bandage
Photo: Elastic roller bandage
Narrator: Gauze or elastic roller bandage: to bandage a wound and stop bleeding with applied pressure.
Sub-heading: Triangular bandage
Photo: Triangular bandage
Narrator: Triangular bandage: to wrap injured areas, support or fix broken limbs.
Sub-heading: Round-ended scissors
Photo: Round-ended scissors
Narrator: Round-ended scissors: to cut adhesive tape, bandages or clothing when necessary.
Sub-heading: Disinfectant
Photo: Disinfectant
Photo: Saline Solution
Narrator: Disinfectant: for disinfecting and cleaning wounds.
Sub-heading: Sterile dressing set
Photo: Sterile dressing set
Photo: An opened sterile dressing set
Narrator: Sterile dressing set: to clean and cover wounds.
Sub-heading: Sterile gauze pad
Photo: Sterile gauze pad
Sub-heading: Non-woven sterile gauze pad
Photo: Non-woven sterile gauze pad
Narrator: Sterile gauze pad: to cover wounds.
Sub-heading: Sterile adhesive bandage
Photo: Sterile adhesive bandage
Narrator: Sterile adhesive bandage: to cover small wounds.
Sub-heading: Plaster
Photo: Plaster
Narrator: Plaster: to fix a dressing
Sub-heading: Disposable gloves
Photo: Disposable gloves
Narrator: Also, disposable gloves
Sub-heading: 3-Ply surgical masks
Photo: 3-Ply Surgical masks
Narrator: and 3-ply surgical masks.
Photo: A girl (5 years old) cuts her finger and asks dad and Mum for help.
Photo: Mum puts on a bandage for her and the first-aid kit is next to her.
Narrator: You should equip yourselves with first-aid skills. When your child gets hurt, you may help your child with the materials in the first-aid kit and take him to the doctor if required. If it is serious, take your child to hospital promptly.
Heading: Living Room Safety
Narrator: Living room safety.
Photo: Living room
Narrator: Furniture in the living room may also cause injuries.
Sub-heading: Choose furniture without sharp edges
Photo: Round table
Narrator: Consider furniture without sharp edges as your first choice.
Sub-heading: Cover sharp edges with corner protectors
Photo: Table with corner protectors
Photo: Drawer with corner protectors
Narrator: If there are sharp edges on the furniture, cover them with corner protectors.
Photo: Glass surface. Big cross.
Photo: Tablecloth. Big cross.
Photo: Table mat. Big cross.
Narrator: You should avoid using furniture with fragile glass surfaces. Don't use tablecloths or table mats; everything will fall off if your child pulls on them.
Sub-heading: Use folding tables or chairs with safety lock
Photo: Folding Table
Photo: Safety lock of folding tables (1), (2)
Narrator: Avoid using folding tables or chairs unless they have a safety lock.
Sub-heading: No stacking
Photo: Plastic boxes are stacked up. Big cross
Photo: Short ladder. Big cross.
Narrator: Don't leave ladders around or stack items, so as to prevent children from climbing and falling down.
Sub-heading: Place sofas against the wall
Photo: A sofa is placed against the wall
Photo: A boy (18 – 24 months old) climbs onto the sofa. Big cross.
Narrator: Sofas should be placed against the wall, or else your child may climb over the back of the sofa and fall down.
Sub-heading: Add railings to balconies
Photo: A balcony with railings
Photo: Door to balcony is opened. Big cross.
Photo: Door to balcony is locked
Narrator: To ensure the safety of your child, balconies should have railings and the balcony doors should be locked at all times.
Sub-heading: Install and lock window guards
Photo: A window guard with a ruler
Photo: Window guards
Photo: Window guards which can be opened
Photo: A locked window guard (1)
Photo: A locked window guard (2)
Narrator: Install standard window guards on all windows. Remember, to keep the window guards locked at all times.
Sub-heading: Tie up curtain cords
Photo: Close-up of the tied-up curtain cords
Photo: A curtain cord
Photo: A girl (18 – 24 months old) is pulling the curtain cord. Big cross.
Narrator: Keep curtain cords out of your child's reach and remember to tie them up. Your child could be strangled and suffocated if her neck gets caught in the cords.
Sub-heading: Door stoppers
Photo: A door stopper fixes the position of a half-opened door
Sub-heading: Magnets
Photo: Magnet fixes the position of an opened door
Narrator: Stop opened doors from swinging with door stoppers or magnets.
Sub-heading: U-shaped door stoppers
Photo: A U-shaped door stopper prevents the door from shutting
Narrator: The U-shaped door stoppers can help protect your child's fingers from being pinched in the door.
Sub-heading: Socket protective covers
Photo: Socket is covered by a protective cover
Narrator: Use protective covers for sockets.
Sub-heading: Put away electric extension units
Photo: An electric extension unit is on top of a cupboard
Narrator: And keep electric extension units out of your child's reach.
Sub-heading: Put safety covers on electric fans
Photo: A safety cover is on an electric fan.
Photo: Close-up of the safety cover.
Narrator: There must be a safety cover on an electric fan.
Sub-heading: Keep the fan away from children's reach
Photo: An electric fan is on top of a cupboard
Narrator: Also, make sure that your child cannot reach the fan.
Sub-heading: Store matches and lighters properly
Photo: A box of matches and lighter
Photo: matches and lighter placed in a drawer
Narrator: Store matches and lighters properly in a drawer, out of the reach of children.
Sub-heading: Fasten seatbelts
Photo: A baby is sitting on the stroller, with the seatbelt fastened.
Photo: A baby is on the high-chair, with seatbelt fastened and locks secured.
Photo: The seatbelt is fastened.
Narrator: Fasten the seatbelt when your child is sitting in high chairs or strollers and secure the booster seat.
Sub-heading: Safe use of iron
Photo: Mum stops her son (5 years old) from approaching her when she is ironing clothes.
Narrator: Children should not be around when you are ironing. It is dangerous if your child touches it.
Photo: An iron is placed on an ironing board. Big cross.
Narrator: When you finish using an iron, don't leave it around. Put it away properly.
Sub-heading: Keep the house clean and tidy
Photo: Mum is tidying up the house.
Narrator: Keep your house clean and tidy. Don't scatter things around or your child may stumble over them.
Heading: Kitchen Safety
Narrator: Kitchen safety.
Photo: A messy kitchen. Big cross.
Photo: A tidy kitchen.
Narrator: A kitchen is also a place full of danger.
Sub-heading: Install a gate
Photo: A gate at the kitchen door
Photo: A boy (18 – 24 months old) is at the kitchen door gate.
Narrator: Install a gate at the kitchen door to prevent your child from entering the kitchen.
Photo: In the kitchen, Mum is carrying her baby. Big cross
Narrator: Also, don't carry your child in the kitchen. Children can reach out and grab things.
Sub-heading: Turn handles of cookware inward
Photo: The handle of cookware points outward on the stove. Big cross.
Photo: The handle of cookware points inward on the stove.
Narrator: The handles of cookware should point inward on the stove. It can prevent your child from tugging it and being scalded accidentally.
Sub-heading: Cover the stove
Photo: A stove is covered.
Narrator: If your stove has a cover, use it when the stove is not in use.
Sub-heading: Put away dangerous items
Photo: Knives and scissors are on the rack which is placed at a far corner on the kitchen counter.
Photo: Electric kettle is placed against the wall on the counter.
Photo: First-aid kit is put up high.
Photo: Detergents are put inside a cupboard.
Narrator: Put all dangerous items, including sharp utensils, medications, electric kettles, hot water flasks and detergents, out of the reach of your child.
Photo: Detergent is stored in soft drink bottle. Big cross.
Narrator: Don't use any drinking bottles to store detergents or other chemicals. It is dangerous if children mistake them as drinks!
Heading: Bathroom Safety
Narrator: Bathroom safety.
Photo: Tidy bathroom
Photo: Untidy bathroom.
Narrator: Take safety precautions in the bathroom too. It is full of traps.
Sub-heading: Keep bathroom door closed
Photo: Bathroom door is closed
Narrator: Always keep the bathroom door closed to prevent your child from entering the bathroom.
Sub-heading: Keep the toilet covered
Photo: Toilet cover is on
Narrator: Besides being hygienic, keeping the toilet covered can also prevent your child from sticking his head into the toilet bowl.
Sub-heading: Keep bathroom clean and dry
Photo: Water on bathroom floor. Big cross
Photo: A dry bathroom
Narrator: Keeping the bathroom dry can protect your child from slipping on the floor.
Sub-heading: Put an anti-slip mat in the bathtub
Photo: An anti-slip mat in the bathtub
Narrator: If you are using a bathtub, put an anti-slip mat inside.
Sub-heading: Put away containers with water
Photo: A bucket is placed on the bathroom floor. Big cross.
Narrator: Don't leave containers filled with water around. Children may drown if they fall into it.
Sub-heading: Use a plastic baby bath
Photo: Baby is bathing in a plastic baby bath
Narrator: Use a plastic bath to bathe your baby in the bath tub.
Photo: Mum is bathing her baby.
Narrator: Never leave your baby in the bath alone, even if it is just for a brief moment.
Sub-heading: Have all items ready
Photo: Mum has all the bathing items needed.
Narrator: Therefore, have all items ready for bathing beforehand.
Sub-heading: Always add cold water before hot water
Photo: Putting cold water into bath basin.
Narrator: When preparing a bath for your child, always put cold water in before hot water.
Sub-heading: Test water temperature with your elbow
Photo: Mum is testing water temperature with her elbow
Narrator: Then, test the water temperature with your elbow before bathing your baby.
Heading: Bedroom Safety
Narrator: Bedroom safety.
Photo: Bedroom (1)
Photo: Bedroom (2)
Narrator: Make sure your child has a safe sleeping environment to protect him from risks.
Sub-heading: Put the cot near your bed
Photo: A cot is next to the parents' bed
Narrator: If possible, let your baby sleep in his cot and put the cot next to your bed.
Sub-heading: Appropriate mattress size
Photo: The size of the mattress fits the size of the baby cot.
Narrator: The mattress should fit the size of the baby cot. If there is a gap, the baby's tiny head may get trapped and he may suffocate as a result. There should not be any soft objects or loosely tucked sheets on the bed. A baby can sleep well without a pillow.
Sub-heading: Lock the bars of the cot
Photo: A baby is sleeping in the cot with bars locked
Narrator: Make sure that the bars are locked to avoid your baby falling onto the floor when in the cot.
Sub-heading: Distance between vertical bars should not exceed 6cm
Photo: Showing the distance between the vertical bars is less than 6cm
Narrator: The distance between the vertical bars should not exceed 6 cm or 2.5 inches. Babies can stick out their heads and get stuck if the bars are too wide apart.
Sub-heading: Height of rails should be higher than 3/4 of your child's height
Photo: A toddler is standing in the cot
Photo: The height of the rails is no less than 3/4 of the height of the baby
Narrator: The height of the cot rails should be higher than 3/4 of your baby's height.
Photo: A baby is sitting on the sofa alone. Big cross.
Photo: A baby is alone on a bed without guards. Big cross.
Narrator: Never leave your baby alone on the sofa or bed without guards, even if it is just for a brief moment.
Photo: A curtain cord is close to the baby cot. Big cross.
Narrator: Make sure that the curtain cords are out of the reach of your child. Your child could be strangled and suffocated if her neck gets caught in it.
Photo: A bunk bed
Narrator: Be cautious if you have a bunk bed at home.
Sub-heading: Install a secure ladder
Photo: A secure ladder on the bunk bed.
Narrator: A secure ladder can prevent accidents.
Sub-heading: Use foam mats
Photo: A foam mat is placed near the bed
Photo: A foam mat
Narrator: You can also have added protection by placing foam mats on the floor.
Photo: A bunk bed with secure safety bars
Photo: A bunk bed is put against the wall
Narrator: The top bunk should be fitted with secure safety bars of an appropriate height.
Sub-heading: Place the bunk bed against the wall
Narrator: Don't leave a gap in between the bed and the wall because children may get themselves stuck.
Photo: Mum is talking to her son (2 years old) at the kitchen door with a gate in between them.
Narrator: Therefore, it is important to pay close attention to your children and give safety education to them when appropriate.
Photo: A family is reading storybook together.
Narrator: So please stay alert! Most injuries can be avoided when preventive measures are taken.
End Shot: Department of Health logo
The Department of Health owns the copyright of this digital video.
This digital video is produced solely for non-commercial use.
It should not be rented, sold or otherwise used for profit-making purposes.
Produced in 2015
Prevent Possible Home Accidents
As your toddler's mobility increases and has strong curiosity to his surroundings, you should be alert to possible home accidents, in addition to having firm positive discipline. Check the safety measures at home regularly.
All you need in your first-aid kit
Home accidents do happen. As children are dependent in protecting themselves, parents need to observe home safety precautions, as well as knowing how to handle accidental injuries at home. Parents should equip yourselves with first-aid skills in case of accidents, and prepare a first-aid kit at home to treat minor injuries. If the condition gets serious, consult a doctor as soon as possible.
A standard first-aid kit should contain:
- Sterilized cotton
- Sterilized gauze
- Dressing Pad
- Adhesive bandages
- Elastic bandage (5cm (2”) wide and 7.5cm (3″) wide each)
- 70% alcohol
- Mild disinfectant
- Safety pins
- Round-ended scissors
- Triangular bandage
- Disposable gloves
Eating
Reaching 18 months old, a child is usually able to feed with fork and spoon and shift gradually from drinking with a training cup to a regular cup. Around two years old, they should eat most of the same food as the family. Let your child eat with the family, so that he can have more choices of food, learn about social etiquette, so as to establish healthy eating habits.
Daily Food Intake

offer your child a variety of food while including food from the five food groups, which are:
- Grains (1 to 2 bowls of whole grain foods, such as brown rice and whole wheat bread)
- Vegetables (4 to 8 heaped table spoons)
- Fruits (1/4 to 1/2 bowl of fruit slices)
- Fish, meat, eggs, beans and alternatives (2 to 4 heaped table spoons)
- Breast milk, milk products (Daily intake is about 360 to 480 ml) and alternatives
However, avoid canned food, food preserved in salt and food which is high in sugar or salt. Also, avoid eating large predatory fish, such as swordfish, sharks or large tuna.
The stomach of a 18-month to 2-year-old has limited capacity. Their appetite is small and varies from day to day, depending on the amount of physical activity and rest. They desire more food after large amount of activity. When they are filled up by snacks or have lower activity level, they would have smaller appetite for meals.
Provide breakfast, lunch and dinner at regular times. Offering healthy snacks 2 to 3 hours after meals can top up their intake of energy and nutrients.
Developing Healthy Living Habit
Healthy eating habit, adequate rest and sufficient physical activities all are essential for children's healthy development. In addition, positive parent-child relationship makes you and your child enjoy every moment including meal time.
Example of Everyday Meals
*Tablespoon (tbsp) refers to Chinese tablespoon
Wake up and Brush Teeth
Take your child to his seat for breakfast after he is awake

Breakfast
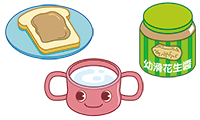
Meal items:
- Creamy Peanut Butter Toast
- 1 slice Bread and
- 1 teaspoon Peanut Butter
- 120ml Whole Milk
Tips:
- Eat with Dad and Mum
- Choose cream peanut butter to prevent choking by peanut chunks
- Don't let your child drink milk from bottle when he is not fully awake
Let your child play or have plenty of physical activities
This is good for appetite, development and health
Snack

Meal items:
- 1/2 Pear
- 120ml Whole Milk
Tips:
- Your child is old enough to drink milk
and water from a cup -
Remember to make using cup interesting
Lunch

Meal items:
- Homemade Sushi roll with cooked Tuna, Egg and Carrot
- 1/2 bowl white Rice
- 2 tbsps.* Tuna
- 1/2 Egg
- 2 tbsps.* Carrot (boiled and shredded)*
- 1 slice Nori
- Water
Afternoon Nap
Afternoon Snack

Meal items:
- 1/3 bowl boiled Corn Kernels with 1 slice of Cheese
- Water
Activities (Indoor / Outdoor)
Have more physical activities to replace sedentary ones
Bath time
Dinner
Meal items:
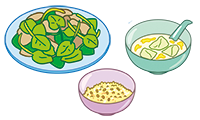
- Stir-fried Chinese Spinach with Beef
- 2 tbsps.* chopped Chinese Spinach
- 2 tbsps.* chopped Beef
- 1/2 bowl Hairy Cucumber Egg Soup
- 1/2 bowl Brown Rice
- Soak the brown rice for 2 hours before cooking with white rice
Tips:
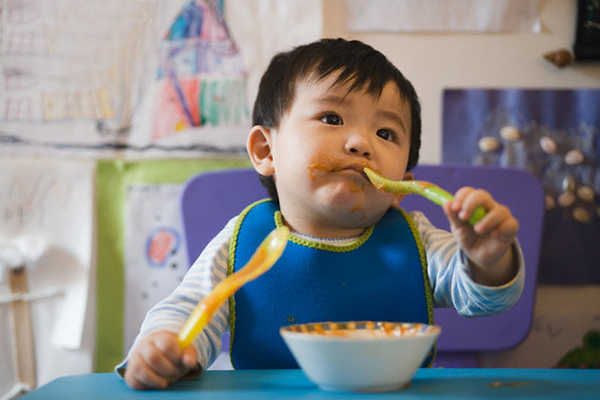
- Establish good eating habit. Never feed your child when he is running around. Let him eat by himself
- Eat together with family
- Teach him to indicate he is full and let him leave his seat if he finishes his meal in 30 minutes
Quality Time
“Quality time” helps building good parent-child relationship with trust, making parenting easier
Evening Snack

Meal items:
- 3 Strawberries
- 90 ml Yoghurt
- Water
Tips:
- Teach your child to share fruits with family
- Sharing with others is enjoyable
Brush Teeth and Go to Bed
Regular daily routines and bedtime routine help your child sleep well
Example of Holiday Meals
*Tablespoon (tbsp) refers to Chinese tablespoon
Wake up and Brush Teeth
Take your child to his seat for breakfast after he is awake
Breakfast
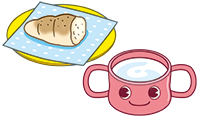
Meal items:
- 1/2 Plain roll/bun
- 120ml Whole milk
Tips:
- Your child is old enough to drink milk
and water from a cup - Don't let your child drink milk from bottle when she is not fully awake
Let your child play or have plenty of physical activities
This is good for appetite, development and health
Snack
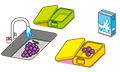
Meal items:
- 3-4 Grapes (Before going out, wash the grapes and put them into a box with lid)
- 120ml Whole milk
Tips:
- Your child is old enough to drink milk from a cup
- Remember to make
using cup interesting
Lunch (Shanghainese Restaurant)

- Stewed noodles with chicken
- 2 tbsps* Chicken
- 1/3 bowl Shanghai noodles
- 1/3 Chinese steamed bun
- 3-4 stalks Baby Shanghai Greens in clear broth
- about 3 tbsps* after chopped
- Water
Meal items:
Afternoon Nap
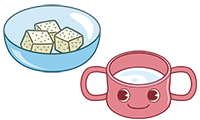
Afternoon Snack

Meal items:
- Mashed Potato with Tomato
- 1 tbsp* chopped Tomato
- Mashed potato (2 egg-sized potatoes)
- Mix 60ml Whole milk
Tips:
- Mum cooks Tomato Potato soup for dinner
Activities (Indoor / Outdoor)
More physical and outdoor activities to replace sedentary ones and to expand his scope of learning
Bath
Dinner
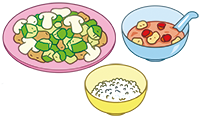
Meal items:
- Stir-fried Zucchini, Mushroom and Meat
- 3 tbsps* chopped Zucchini and Mushroom
- 2 tbsps* chopped Meat
- 1/2 bowl Tomato Potato Soup
- 1/2 bowl White rice
Tips:
- Establish good eating habit. Never feed your child when he is running around. Let him eat by himself
- Eat together with family
- Teach him to indicate he is full and let him leave his seat if he finishes his meal in 30 minutes
Playtime
Evening Snack
Meal items:
- Diced Dragon Fruit (about 1/4 bowl)
- 60ml Whole milk (when needed)
Tips:
- By age 1, balanced diet with a variety of solid food replaces milk to be the main source of nutrients
Brush Teeth and Sleep
Regular daily and bedtime routine helps your child sleep well
Obstacles to happy eating
Parents try every possible means to get their children to eat more. These methods appear to be helpful, but there are many underlying problems which prevent your child from developing health eating habit. Therefore, read the link and try to remove these obstacles.
Dealing with Child's Eating behaviours
Encourage and praise desirable behaviours

My child is not eating – Check if he is full
First, find out if he has already eaten enough. He may be full if he holds food in his mouth, appears distracted, plays with the food continuously, shakes his head, throws a tantrum when offered food, urges to leave his seat, or says he is full. If you find out that he is full, let him leave the dining table instead of forcing him to eat. Wait until the next snack time before giving him food.
When your child misbehaves – “Planned Ignoring”
If you are sure that he is not full, but plays with the food or spoon or whines, your child may be doing things to seek your attention. You can use the “planned ignoring” strategy in response. Do not give him any attention until he stops the misbehaviour. Then, direct his attention to the meal again. Don't forget to praise him when he is cooperative and continues to eat.
Weaning from the Bottle
After the age of 1, your child gains nutrients from a variety of foods in her meals and no longer relies on milk as the major source of nutrients. By 18 months old, she should stop drinking milk from the bottle completely. If your child stays on the bottle too long, it would:
- cause tooth decay
- reduce appetite for other foods
- cause her to become overweight
How to Wean from the Bottle?
- Switch your child to a cup for water or milk gradually, and let her learn to drink from a cup while sitting.
- Start by replacing the bottle with a cup for one feeding during the daytime, then gradually for other meals when she gets used to it.
- Avoid offering your child a cup where she is normally bottle-fed.

No More Bottles before Bedtime
Many parents see that giving a bottle to their children would help them sleep tight. When children get used to falling asleep with the bottle, problems may arise. He might become dependent on the bottle or milk to go to sleep, and hence cannot fall asleep by himself; it will cause tooth decay as a result of sucking from the bottle; and overfeeding on milk will lead to obesity. To help your child stop drinking from the bottle, you can refer to the following ways:
- It is easier when the daytime bottle is stopped first. Then wean the morning and the bedtime bottles one after another.
- Avoid exciting activities before bedtime for your child to sleep well.
- At night time, give him half cup of milk and some bread. Then brush his teeth.
- Replace using the bottle with other bedtime routine, e.g. talking to your child or reading picture books with him at his bedside.
- Say goodnight and leave when he gets sleepy.
- You may give your child a comfy to sleep with, such as a stuffed doll or a hanky.
- If you find it difficult to ignore the child's protest even after trying the above routines, you may gradually reduce the volume of milk in the bottle for every second night for the feed before bedtime. This may take a week or so to phase out bedtime feeding on the bottle.
- It helps when the feeding is not done at where he sleeps.
- Be persistent and ensure that the whole family works together during the phasing out process. This will help your child get through it.
Teething
Your child should have at least a tooth now. Teeth are our life-long friends. Parents have a role to educate their children on dental care since their early age. Apart from building up healthy eating habits, it is also time to teach your child to use a children's toothbrush.
Sleep
Sleeping hours
The sleeping hours will change as our child grows:
| Age | Total sleeping hours in 24-hour period* (include both day and night sleep) |
|---|---|
| Age 1-2 | ~ 11-14 hours |
*Reference: WHO guidelines on physical activity, sedentary behaviour and sleep for children under 5 years of age. Geneva: World Health Organization; 2019. Licence: CC BY-NC-SA 3.0 IGO.
Regular daytime and bedtime routines help our child sleep well.
Adequate physical activities and sleep everyday helps our child thrive and develop.